There is a simple way to add transparent text to a photo in Photoshop. The trick, create a new layer then fill the layer with the color we want. Adjust the transparency of the layer by adjusting the opacity of the layer palette to around 60% to 70%. Resize the layer using the Free Transform command so that it fits the text. After typing and arranging your text, make a selection around the text. Finally, delete the selection area so that the image on the background layer is visible. This way you will get a transparent text effect. For more details, follow the steps below:
Stock for this Photoshop tutorial 945497-Pixabay.
1. Open Photo And Create New Layer.
Select menu File> Open. In the Open window, click your photo and then click the Open button. By default the Background layer will be created. Click the Create a new layer icon.It's located at the bottom of the layer pallette. A new layer will be formed with the name Layer 1. We will use this layer as a text background.
2. Fill the Text Background Layer with Color.
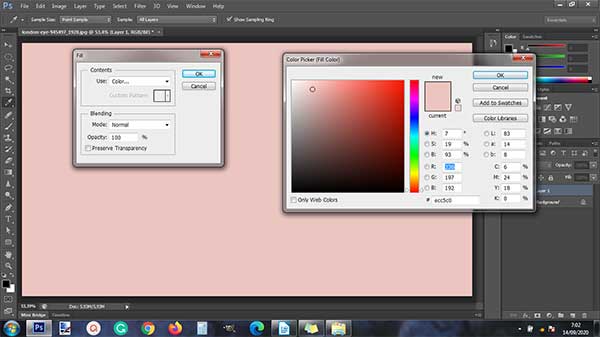
Click Layer 1 to activate it then select the Edit menu> Fill. In the Use dropdown, select Color then select the color you want in the Color picker window. I'll go for the color #ccfabc. Click the OK button to close the Color Picker window. Click the OK button to close the Fill window. Then set Layer 1's opacity to a value of 70-90% so that the photo on the layer below can still be seen.
3. Resize the Text Background Layer Using Free Transform.
Click Layer 1 then press Ctrl + T key to invoke Free Transform command. A help box will appear around the canvas. Please click on the Free Transform tool box then drag it down to reduce it. When finished press Enter.
4. Select the Vertical Type Tool.
Click the Vertical Type Tool icon in the Tool Panel box. On the Option bar, please select a font type, font size and select a black font color.
5. Write Text On Document.
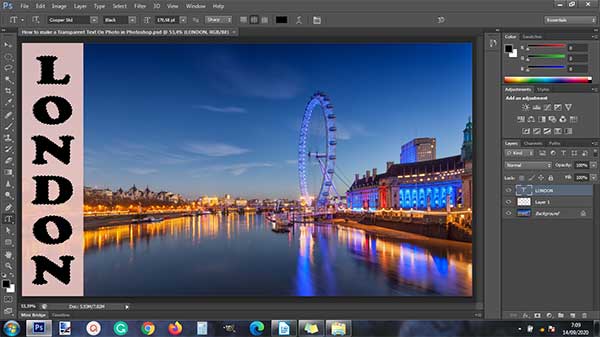
Click on the document then enter your text. Press Ctrl + Enter when you're done typing your writing.
6. Adjust Text Size Using Free Transform.
With the text layer as the active layer, press Ctrl + T key to invoke the Free Transform command. Please adjust the text size by clicking on the Free Transform tool box (circled in red) then dragging. When finished, press the Enter key on the keyboard.
7. Make a Selection Around the Writing.
While holding down the Ctrl key, click on the thumbnail of the text layer. A selection will form around our text.
10. Delete Post.
Click Layer 1 then press the delete button to delete the text in the selection. Remove the visibility option for the Text layer by clicking on the eye icon. Remove the selection by choosing the menu Select> Deselect. The transparent text effect on the photo is finished using Photoshop.
Here is the result:


No comments:
Post a Comment